## Prerequisites
Before you start using this development framework, make sure you have installed all required software and done all the
necessary configuration, see this [page](https://github.com/Alfresco/alfresco-ng2-components/blob/master/PREREQUISITES.md).
See it live: [Login Quickstart](http://embed.plnkr.co/PfZytJyHcl3xIsa8pdMo/)
## Install
Follow the 3 steps below:
1. Npm
```sh
npm install ng2-alfresco-login --save
```
2. Html
Include these dependencies in your index.html page:
```html
```
3. SystemJs
Add the following components to your systemjs.config.js file:
- ng2-translate
- ng2-alfresco-core
- alfresco-js-api
- ng2-alfresco-login
Please refer to the following example file: [systemjs.config.js](demo/systemjs.config.js) .
## Basic usage
This component allow to authenticate to Alfresco One and Alfresco Activiti.
```html
```
Usage example of this component :
**main.ts**
```ts
import { NgModule, Component } from '@angular/core';
import { BrowserModule } from '@angular/platform-browser';
import { platformBrowserDynamic } from '@angular/platform-browser-dynamic';
import { CoreModule, AlfrescoSettingsService, AlfrescoAuthenticationService } from 'ng2-alfresco-core';
import { LoginModule } from 'ng2-alfresco-login';
@Component({
selector: 'my-app',
template: `
`
})
export class AppComponent {
constructor(public auth: AlfrescoAuthenticationService,
private settingsService: AlfrescoSettingsService) {
settingsService.ecmHost = 'http://localhost:8080/';
settingsService.bpmHost = 'http://localhost:9999/';
}
mySuccessMethod($event) {
console.log('Success Login EventEmitt called with: ' + $event.value);
}
myErrorMethod($event) {
console.log('Error Login EventEmitt called with: ' + $event.value);
}
}
@NgModule({
imports: [
BrowserModule,
CoreModule.forRoot(),
LoginModule
],
declarations: [ AppComponent ],
bootstrap: [ AppComponent ]
})
export class AppModule { }
platformBrowserDynamic().bootstrapModule(AppModule);
```
#### Properties
| Name | Type | Default Value | Description |
| --- | --- | --- | --- |
| `providers` | string | ECM | Possible valid value are ECM, BPM or ALL. The default behaviour of this component will logged in only in the ECM . If you want log in in both system the correct value to use is ALL |
| `disableCsrf` | boolean | false | To prevent the CSRF Token from been submitted. Only for Activiti call |
| `needHelpLink` | string | '' | It will change the url of the NEED HELP link in the footer |
| `registerLink` | string | '' | It will change the url of the REGISTER link in the footer |
| `logoImageUrl` | string | Alfresco logo image | To change the logo image with a customised image |
| `backgroundImageUrl` | string | Alfresco background image | To change the background image with a customised image |
| `fieldsValidation` | { [key: string]: any; }, extra?: { [key: string]: any; } | | Use it to customise the validation rules of the login form |
| `showRememberMe` | boolean | false | Toggle `Remember me` checkbox visibility |
| `showLoginActions` | boolean | false | Toggle extra actions visibility (`Need Help`, `Register`, etc.) |
#### Events
| Name | Description |
| --- | --- |
| `onSuccess` | The event is emitted when the login is done |
| `onError` | The event is emitted when the login fails |
| `executeSubmit` | The event is emitted when the form is submitted |
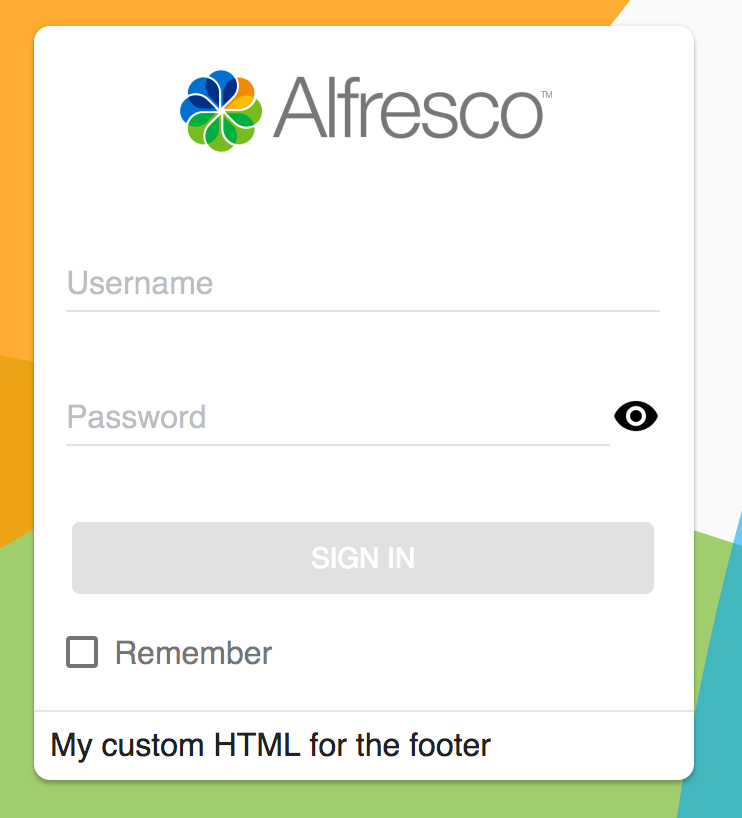
## Change footer content
You can replace the entire content in the footer of the login component with your custom content.
```html
My custom HTML for the footer`
```
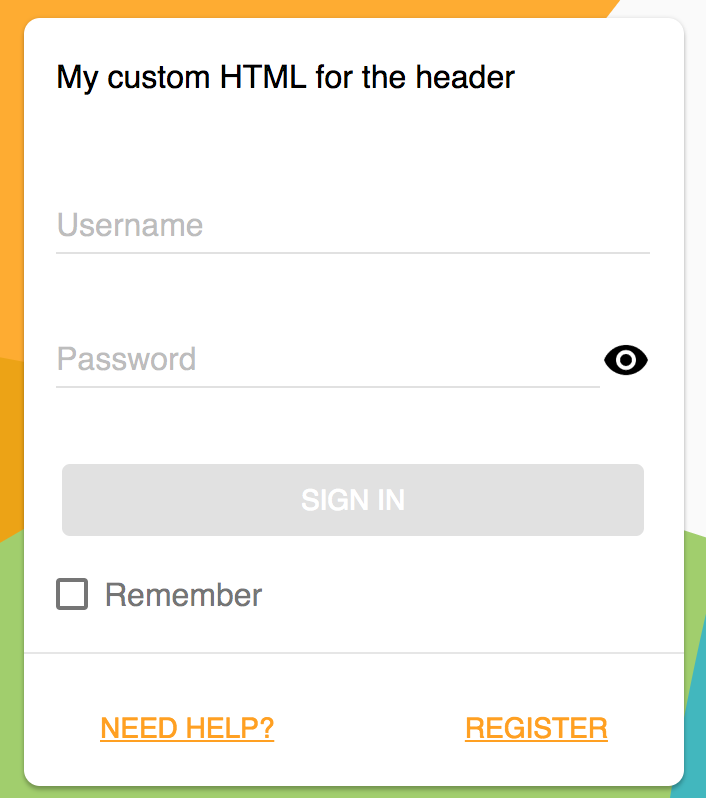
## Change header content
You can replace the entire content in the header of the login component with your custom content.
```html
My custom HTML for the header`
```
## Extra content
You can put additional html content between `alfresco-login` tags to get it rendered as part of the login dialog.
This becomes handy in case you need extending it with custom input fields handled by your application or parent component:
```html
You extra content
```
Here's an example of custom content:
## Custom logo and background
It is possible changing logo and background images to custom values.
```html
```
Should give you something like the following:
Alternatively you can bind to your component properties and provide values dynamically if needed:
```html
```
#### Customize Validation rules
If needed it is possible customise the validation rules of the login
form. You can add/modify the default rules of the login form.
**MyCustomLogin.component.html**
```html
```
**MyCustomLogin.component.ts**
```ts
export class MyCustomLogin {
customValidation: any;
constructor(public router: Router) {
this.customValidation = {
username: ['', Validators.compose([Validators.required, Validators.minLength(8), Validators.maxLength(10)])],
password: ['', Validators.required]
};
}
ngOnInit() {
this.alfrescologin.addCustomValidationError('username', 'minlength', 'Username must be at least 8 characters.');
this.alfrescologin.addCustomValidationError('username', 'maxlength', 'Username must not be longer than 11 characters.');
}
}
```
#### Controlling form submit execution behaviour
If absolutely needed it is possible taking full control over form
submit execution by means of `executeSubmit` event.
This event is fired on form submit.
You can prevent default behaviour by calling `event.preventDefault()`.
This allows for example having custom form validation scenarios and/or additional validation summary presentation.
Alternatively you may want just running additional code without suppressing default one.
**MyCustomLogin.component.html**
```html
```
**MyCustomLogin.component.ts**
```ts
export class MyCustomLogin {
validateForm(event: any) {
let values = event.values;
// check if the username is in the blacklist
if (values.controls['username'].value === 'invalidUsername') {
this.alfrescologin.addCustomFormError('username', 'the
username is in blacklist');
event.preventDefault();
}
}
}
```
**Please note that if `event.preventDefault()` is not called then default behaviour
will also be executed after your custom code.**
## Build from sources
Alternatively you can build component from sources with the following commands:
```sh
npm install
npm run build
```
### Build the files and keep watching for changes
```sh
npm run build:w
```
## Running unit tests
```sh
npm test
```
### Running unit tests in browser
```sh
npm test-browser
```
This task rebuilds all the code, runs tslint, license checks and other quality check tools
before performing unit testing.
### Code coverage
```sh
npm run coverage
```
## Demo
If you want have a demo of how the component works, please check the demo folder :
```sh
cd demo
npm install
npm start
```
## NPM scripts
| Command | Description |
| --- | --- |
| npm run build | Build component |
| npm run test | Run unit tests in the console |
| npm run test-browser | Run unit tests in the browser
| npm run coverage | Run unit tests and display code coverage report |
## License
[Apache Version 2.0](https://github.com/Alfresco/alfresco-ng2-components/blob/master/LICENSE)


 You can replace the entire content in the footer of the login component with your custom content.
```html
You can replace the entire content in the footer of the login component with your custom content.
```html
 You can replace the entire content in the header of the login component with your custom content.
```html
You can replace the entire content in the header of the login component with your custom content.
```html
 ## Custom logo and background
It is possible changing logo and background images to custom values.
```html
## Custom logo and background
It is possible changing logo and background images to custom values.
```html
 Alternatively you can bind to your component properties and provide values dynamically if needed:
```html
Alternatively you can bind to your component properties and provide values dynamically if needed:
```html