5.6 KiB
Title, nav
| Title | nav |
|---|---|
| ナビゲーション | ja |
ナビゲーション
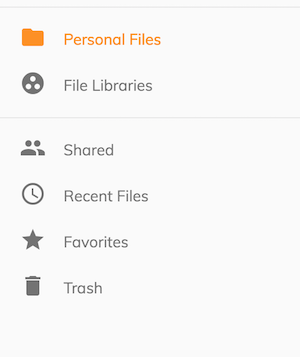
Alfresco Content Application は、次のナビゲーションリンクを提供します:
- 個人用ファイル
- ファイルライブラリ
- 共有
- 最近使用したファイル
- お気に入り
- ごみ箱
サイドナビゲーションは、app.config.json を編集してリンクの外観をカスタマイズするサポートを提供します。
カスタマイズ
ナビゲーション設定は、スキーマのような配列とオブジェクトをサポートします。オブジェクトを定義すると、ナビゲーションがリンクの異なるグループ間の視覚的な区切り文字をレンダリングするのに役立ちます。
{
  "navigation": {
    "main": [],
    "secondary": []
  }
}
{
  "navigation": [
    {},
    {}
  ]
}

アイコンとテキストをカスタマイズする
icon - サポートされる値は、Material Design アイコンライブラリの任意のものです。定義されていない場合、リンクはラベルの値のみをレンダリングします。
title - 指定された値でネイティブブラウザのツールチップをレンダリングするようにリンクに指示します。文字列または国際化定義の参照が可能です。定義されていない場合、リンクにはツールチップが表示されません。
label - リンクの視覚的な名前を表します。文字列または国際化定義の参照が可能です。
注意: "route": { "url": "/..." } の値を変更すると、これらはアプリケーションルーティングシステムにマッピングされるため、ナビゲーションに影響します。
カスタムテキスト (i18n)
ナビゲーションリンクの title と label を変更するには、/src/assets/i18n/en.json にある BROWSE エントリの下の値を編集します
{
  "APP": {
    "BROWSE": {
      "PERSONAL": {
        "TITLE": "Personal Files",
        "SIDENAV_LINK": {
          "LABEL": "Personal Files",
          "TOOLTIP": "View your Personal Files"
        }
      }
    }
  }
}
国際化の詳細については、国際化 (i18n) セクションを参照してください。
ユーザー定義のナビゲーション
アプリケーションにカスタムナビゲーションリンクを追加するには、最初にコンポーネントを作成する必要があります。
src/app/components/custom-page/custom-page.component.ts
import { Component } from '@angular/core';

@Component({
template: `
    <h4>{{ title }}</h4>
    `
})
export class CustomPage {
    title = 'My Custom Page'
}
コンポーネントを app.module.ts に登録します
import { CustomPage } from './components/custom-page/custom-page.component';

@NgModule({
  declarations: [
    CustomPage
  ]
})
app.config.json で、カスタムページを指すリンクエントリを定義します
{
  "navigation": [
      "main": [ ... ],
      "secondary": [ ... ],
      "custom": [
        {
          "icon": "work",
          "label": "Link",
          "title": "My custom link",
          "route": {
              "url": "/custom-route"
          }
        }
      ]
  ]
}
これは ngrx ストアアクションを使用して宣言することもできます:
{
  "navigation": [
      "main": [ ... ],
      "secondary": [ ... ],
      "custom": [
        {
          "icon": "work",
          "label": "Link",
          "title": "My custom link",
          "click": {
              "action": "NAVIGATE_ROUTE",
              "payload": "custom-route"
          }
        }
      ]
  ]
}
app.routes.ts の /custom-route を LayoutComponent 定義の子コンポーネントとしてマッピングします。
import { CustomPage } from './components/custom-page/custom-page.component.ts';

export const APP_ROUTES: Routes = [
  {
    path: '',
    component: LayoutComponent,
    children: [
     {
        path: 'custom-route',
        component: CustomPage
      }
    ]
  }
]

カスタムコンポーネントのレンダリング
ナビゲーション定義は、動的にレンダリングされるカスタムコンポーネントもサポートします。このスキーマは次のとおりです:
{
  "navbar": [
    {
      "id": "app.navbar.primary",
      "items": [
        {
          "id": "custom-component",
          "component": "custom-menu-item"
        }
      ]
    }
  ]
}
ナビゲーションアイテムやナビゲーションアイテムのグループは、定義されたルールに基づいて条件付きでレンダリングすることができます。
{
  "navbar": [
    {
      "id": "custom-group-1",
      "rules": {
        "visible": "rule-reference-id"
      },
      "items": []
    },
    {
      "id": "custom-group-2",
      "items": [
        {
          "id": "itemId",
          "rules": {
            "visible": "rule-reference-id"
          }
        }
      ]
    }
  ]
}
ルールの詳細については、ルール セクションを参照してください。
カスタムページのコンテンツの詳細については、ドキュメントリストのレイアウト セクションを参照してください。