* fix after rebase

* new release strategy for ng next

Signed-off-by: eromano <eugenioromano16@gmail.com>

* peer dep

Signed-off-by: eromano <eugenioromano16@gmail.com>

* Angular 14

fix unit test and storybook

Signed-off-by: eromano <eugenioromano16@gmail.com>

fix after rebase

Signed-off-by: eromano <eugenioromano16@gmail.com>

update pkg.json

Signed-off-by: eromano <eugenioromano16@gmail.com>

missing dep

Signed-off-by: eromano <eugenioromano16@gmail.com>

Fix mistake and missing code

Dream....build only affected libs

Add utility run commands

* Use nx command to run affected tests

* Fix nx test core

fix content tests

Run unit with watch false

core test fixes

reduce test warnings

Fix process cloud unit

Fix adf unit test

Fix lint process cloud

Disable lint next line

Use right core path

Fix insights unit

fix linting insights

Fix process-services unit

fix the extensions test report

fix test warnings

Fix content unit

Fix bunch of content unit

* Produce an adf alpha of 14

* hopefully fixing the content

* Push back the npm publish

* Remove flaky unit

* Fix linting

* Make the branch as root

* Get rid of angualar13

* Remove the travis depth

* Fixing version for npm

* Enabling cache for unit and build

* Fix scss for core and paths

Copy i18 and asset by using ng-packager

Export the theming alias and fix path

Use ng-package to copy assets process-services-cloud

Use ng-package to copy assets process-services

Use ng-package to copy assets content-services

Use ng-package to copy assets insights

* feat: fix api secondary entry point

* fix storybook rebase

* Move dist under dist/libs from lib/dist

* Fix the webstyle

* Use only necessary nrwl deps and improve lint

* Fix unit for libs

* Convert lint.sh to targets - improve performance

* Use latest of angular

* Align alfresco-js-api

Signed-off-by: eromano <eugenioromano16@gmail.com>
Co-authored-by: eromano <eugenioromano16@gmail.com>
Co-authored-by: Mikolaj Serwicki <mikolaj.serwicki@hyland.com>
Co-authored-by: Tomasz <tomasz.gnyp@hyland.com>
11 KiB
Title, Added, Status, Last reviewed
| Title | Added | Status | Last reviewed |
|---|---|---|---|
| Login component | v2.0.0 | Active | 2019-03-20 |
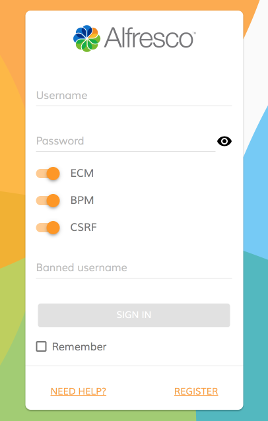
Login component
Authenticates to Alfresco Content Services and Alfresco Process Services.
Contents
Basic usage
<adf-login
    successRoute="/home">
</adf-login>
Transclusions
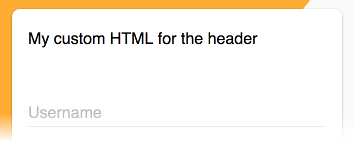
You can replace the content of the header and footer of the Login component with your own custom content:
<adf-login ...>
    <adf-login-header><ng-template>My custom HTML for the header</ng-template></adf-login-header>
    <adf-login-footer><ng-template>My custom HTML for the footer</ng-template></adf-login-footer>
</adf-login>`
Header:
Footer:

Also, any content that you put inside the <adf-login> tags will be rendered as part
of the Login dialog:
<adf-login ...>
    <div>
        <div><!-- Custom content goes here --></div>
    </div>
</adf-login>
This is useful if you need to extend the functionality of the dialog with custom input fields handled by your application or parent component:
Class members
Properties
| Name | Type | Default value | Description |
|---|---|---|---|
| backgroundImageUrl | string |
Path to a custom background image. | |
| copyrightText | string |
The copyright text below the login box. | |
| fieldsValidation | any |
Custom validation rules for the login form. | |
| logoImageUrl | string |
Path to a custom logo image. | |
| needHelpLink | string |
"" | Sets the URL of the NEED HELP link in the footer. |
| registerLink | string |
"" | Sets the URL of the REGISTER link in the footer. |
| showLoginActions | boolean |
true | Should the extra actions (Need Help, Register, etc) be shown? |
| showRememberMe | boolean |
true | Should the Remember me checkbox be shown? When selected, this option will remember the logged-in user after the browser is closed to avoid logging in repeatedly. |
| successRoute | string |
null | Route to redirect to on successful login. |
Events
| Name | Type | Description |
|---|---|---|
| error | EventEmitter<LoginErrorEvent> |
Emitted when the login fails. |
| executeSubmit | EventEmitter<LoginSubmitEvent> |
Emitted when the login form is submitted. |
| success | EventEmitter<LoginSuccessEvent> |
Emitted when the login is successful. |
Details
Handling events
app.component.html
<adf-login
    (success)="mySuccessMethod($event)"
    (error)="myErrorMethod($event)">
</adf-login>
app.component.ts
export class AppComponent {

    mySuccessMethod($event) {
        console.log('Success Login EventEmitt called with: ' + $event.value);
    }

    myErrorMethod($event) {
        console.log('Error Login EventEmitt called with: ' + $event.value);
    }
}
Custom logo and background
You can change the logo and background images using the backgroundImageUrl and
logoImageUrl properties:
<adf-login
    [backgroundImageUrl]="'http://images.freeimages.com/images/previews/638/wood-wall-for-background-1634466.jpg'"
    [logoImageUrl]="'http://images.freeimages.com/images/previews/eac/honeybee-with-a-house-1633609.jpg'">
</adf-login>

You can also bind to your component properties and provide values dynamically if you need to:
<adf-login
    [backgroundImageUrl]="myCustomBackground"
    [logoImageUrl]="myCustomLogo">
</adf-login>
Customizing validation rules
You can add to or modify the default validation rules of the login form if you need your own custom validation:
MyCustomLogin.component.html
<adf-login
    [fieldsValidation]="customValidation"
    #alfrescoLogin>
</adf-login>
MyCustomLogin.component.ts
export class MyCustomLogin {

    @ViewChild('alfrescoLogin')
    alfrescoLogin: any;

    customValidation: any;

    constructor(public router: Router) {
        this.customValidation = {
            username: ['', Validators.compose([Validators.required, Validators.minLength(8), Validators.maxLength(10)])],
            password: ['', Validators.required]
        };
    }

    ngAfterViewInit() {
        this.alfrescoLogin.addCustomValidationError('username', 'minlength', 'Username must be at least 8 characters.');
        this.alfrescoLogin.addCustomValidationError('username', 'maxlength', 'Username must not be longer than 11 characters.');
    }
}
Call an external identity provider to fetch the auth token
You can access an external provider to get an auth token for a user:
app.config.json
{
    "oauth2" : {
      "host": "http://myhost.com",
      "authPath": "/my-custom-auth/token",
      "clientId": "my-client-id",
      "secret": ""
    }
}
MyCustomLogin.component.html
<adf-login
    [providers]="'OAUTH'"
    (success)="onMyAuthLogin($event)">
</adf-login>
MyCustomLogin.component.ts
export class MyCustomLogin {

    constructor(public router: Router) {
    }

    onMyAuthLogin($event) {
        console.log("My token " + $event.token.ticket)
        this.router.navigate(['/home']);
    }
}
Override the successRoute from app.config.json with Basic Auth
When the user is logged in the login componet redirect him to the successRoute. This route can be overriden from the app.config.json. The successRoute must to be a valid app route.
app.config.json
{
    "successRoute" : "/my-landing-page"
}
Controlling form submit execution behaviour
The standard form submission system is suitable for most tasks but you can
take full control of submission if you need to. Use the executeSubmit event
to modify the submission process with your own code just after the form is
submitted.
If you want to replace the submission process completely (rather than just extend
it), you can use event.preventDefault() in the handler to avoid the default
behavior. You could use this, for example, to customize the validation heavily or
to present a summary of validation before submitting the form.
MyCustomLogin.component.html
<adf-login
    (executeSubmit)="validateForm($event)"
    #alfrescoLogin>
</adf-login>
MyCustomLogin.component.ts
export class MyCustomLogin {

    validateForm(event: any) {
        let values = event.values;

        // check if the username is in the blacklist
        if (values.controls['username'].value === 'invalidUsername') {
            this.alfrescoLogin.addCustomFormError('username', 'the username is in blacklist');
            event.preventDefault();
        }
    }

}
Note that if you do not call event.preventDefault() then the default behaviour
will execute after your custom code has completed.
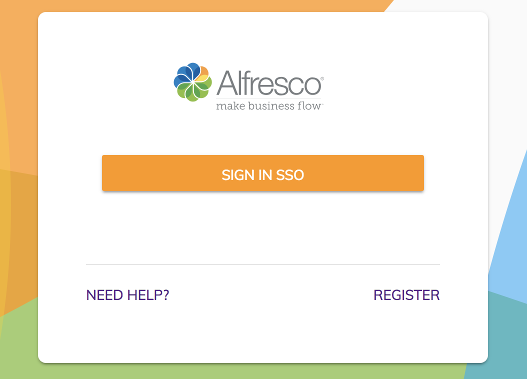
Single Sign-On (SSO)
Implicit Flow
If you used the host-setting component to enable SSO Oauth (or if you
enabled the setting in app.config.json) then the login component will show only a button to login:
{
    "providers": "ECM",
    "authType" :"OAUTH",
    "oauth2": {
      "host": "<AUTH-SERVER>/auth/realms/alfresco",
      "clientId": "activiti",
      "scope": "openid",
      "secret": "",
      "implicitFlow": true,
      "silentLogin": false,
      "redirectUri": "/",
      "redirectUriLogout": "/logout"
    }
}
Note that if the silentLogin property in the oauth2 configuration is set to true
then the login page will not be shown. Instead, the application will redirect
automatically to the authorization server when the user is not logged-in
Silent login
You can also enable automatic redirection to the OAuth provider using the following properties:
silentLoginredirectSilentIframeUri
{
  "providers": "ECM",
  "authType": "OAUTH",
  "oauth2": {
    "host": "<AUTH-SERVER>/auth/realms/alfresco",
    "clientId": "alfresco",
    "scope": "openid",
    "secret": "",
    "implicitFlow": true,
    "silentLogin": true,
    "redirectSilentIframeUri": "/assets/silent-refresh.html",
    "redirectUri": "/",
    "redirectUriLogout": "/logout"
  },
Note that if you deploy the application to a virtual folder
(for example http://<ADDRESS>/my-app) then redirectSilentIframeUri
must contain the full URI value:
{
    "redirectSilentIframeUri": "http://<ADDRESS>/my-app/assets/silent-refresh.html",
}
In the default ADF application configurations the
silent-refresh.htmlfile gets automatically copied to the application output when building for production.
Public urls
To enable public accessible urls, that don't need authentication, these must be defined using publicUrls property. The list supports absolute urls or partial urls that are valid minimatch patterns
{
    ...
    "publicUrls": ["http://<ADDRESS>/my-app/some/path", "**/my-app/*/path"]
    ...
}
Oauth2 Properties
You can find all the oauth2 configurations in the JS-API oauth2 properties documentation
Kerberos
The configuration for Kerberos authentication will allow users to access Alfresco products by entering their credentials only once when first logging into their Windows environment.
You don't need to use the login component in order to enable Kerberos SSO in ADF.
See Kerberos Configuration for instructions on configuring Kerberos for an ADF app.